

Introduzione agli attributi degli eventi HTML
In questo articolo, discuteremo in dettaglio degli attributi dell'evento HTML. Gli eventi sono le azioni eseguite a seguito dell'azione dell'utente. Ad esempio, quando un utente preme un tasto in una tastiera per leggere i dati, si dice che siano eventi da tastiera. Queste attività vengono eseguite quando un utente cerca in un sito Web ed esegue un clic sul pulsante o quando una pagina viene caricata premendo il pulsante di aggiornamento in cui il browser esegue la manipolazione delle pagine, tutte queste azioni sono considerate un evento. Qui passeremo attraverso una comprensione di base degli eventi e di come funziona nel browser sulle azioni dell'utente. Esiste un diverso tipo di eventi che si verificano nell'intera finestra del browser e sono spiegati nelle sezioni seguenti.
Primi 5 attributi dell'evento HTML

Esiste una variante diversa di eventi disponibili nell'HTML. E tutti questi eventi hanno un piccolo blocco di codice chiamato come gestore di eventi che viene generato quando viene eseguita l'azione dell'evento. Questi sono allegati agli elementi HTML. I gestori o i listener di eventi svolgono un ruolo importante negli attributi dell'evento HTML. Vediamo diversi tipi di attributi di eventi che sono dichiarati globali e applicati agli elementi HTML anche il loro lavoro in dettaglio. Vengono principalmente utilizzati quattro attributi di eventi principali. Loro sono:
- Evento finestra
- Eventi form
- Eventi del mouse
- Eventi tastiera
- Trascina e rilascia eventi
Descriveremo tutti questi attributi uno per uno con un esempio. In primo luogo, andremo con.
1. Evento finestra
- onafterprintEvent: questo attributo è supportato da tutti i tag HTML e funziona quando una pagina ha iniziato a stampare e ha uno script a valore singolo. Ecco un esempio di codice HTML. Questo esempio mostra quando si preme un pulsante che stampa un messaggio da stampare in un messaggio di dialogo.
Codice:
Windows onafterprint Event

Windows onafterprint Event
This attribute works in IE and Mozilla

function myfun() (
alert("Document is being printed");
)
Windows onafterprint Event
Windows onafterprint Event
This attribute works in IE and Mozilla
function myfun() (
alert("Document is being printed");
)
Windows onafterprint Event
Windows onafterprint Event
This attribute works in IE and Mozilla
function myfun() (
alert("Document is being printed");
)
Windows onafterprint Event
Windows onafterprint Event
This attribute works in IE and Mozilla
function myfun() (
alert("Document is being printed");
)
Windows onafterprint Event
Windows onafterprint Event
This attribute works in IE and Mozilla
function myfun() (
alert("Document is being printed");
)
Windows onafterprint Event
Windows onafterprint Event
This attribute works in IE and Mozilla
function myfun() (
alert("Document is being printed");
)
Produzione:
- onbeforeprint: funziona prima della stampa. L'evento viene generato dopo il processo di stampa. Di seguito è riportato il codice di esempio.
Codice:
body (
color: #9370DB;
background-color: #BC8F8F;
text-align: center;
padding: 20px;
)
p (
font-size: 2rem;
)

Attribute Demo
body (
color: #9370DB;
background-color: #BC8F8F;
text-align: center;
padding: 20px;
)
p (
font-size: 2rem;
)
Attribute Demo
body (
color: #9370DB;
background-color: #BC8F8F;
text-align: center;
padding: 20px;
)
p (
font-size: 2rem;
)
Attribute Demo
body (
color: #9370DB;
background-color: #BC8F8F;
text-align: center;
padding: 20px;
)
p (
font-size: 2rem;
)
Attribute Demo
trigger per stampare.
funzione get () (
document.body.style.background = "# 00BFFF";
)
Produzione:
- onerror: questa funzione viene attivata quando viene generato un errore mentre non esiste alcun elemento.
Codice:

Ciao mondo.
function myFun () (alert ("problema con il caricamento dell'immagine.");
)
Produzione:
- onload: questa funzione aiuta a caricare un oggetto e funziona bene per vedere se una pagina web è caricata correttamente.
Codice:
onload event demo
function ldImg() (
alert("image loaded without error");
)
Produzione:

- onresize: questo evento viene attivato quando la finestra del browser viene ridimensionata e qualsiasi elemento può essere attivato con l'attributo ridimensionamento.
Codice:
onresize event
function cmg() (
alert('welcome to educba');
)
window.onresize = cmg;
onclick="alert(window.onresize);">
Produzione:
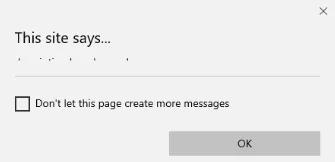
- onunload: questo evento viene attivato quando una finestra di una pagina Web viene chiusa o quando un utente lascia la pagina Web. Il codice seguente scarica la pagina quando un utente lascia e lancia un avviso grazie per la ricerca. Questo evento funziona a volte in tutti i browser.
Codice:
Welcometo educba tutorial
Welcometo educba tutorial
Welcometo educba tutorial
Lascia la pagina
funzione onfunc () (alert ("Grazie per la ricerca!");
)
Produzione:

2. Eventi form
Funziona con i controlli forma. Di seguito sono riportati gli attributi che si verificano quando l'utente interagisce con i browser.
- onblur: questo evento si verifica quando l'attenzione dell'utente è lontana dalla finestra del modulo. L'esempio seguente prende l'input in lettere minuscole e quando si fa clic sul pulsante di invio trasforma l'output in maiuscolo.
Codice:
Form onblur
body (
text-align:center;
)
h1 (
color:pink;
)

EDUCBA
onblur="myfunc()">
Submit
function myfunc() (
var a = document.getElementById("aaa");
a.value = a.value.toUpperCase();
)
Form onblur
body (
text-align:center;
)
h1 (
color:pink;
)
EDUCBA
onblur="myfunc()">
Submit
function myfunc() (
var a = document.getElementById("aaa");
a.value = a.value.toUpperCase();
)
Form onblur
body (
text-align:center;
)
h1 (
color:pink;
)
EDUCBA
onblur="myfunc()">
Submit
function myfunc() (
var a = document.getElementById("aaa");
a.value = a.value.toUpperCase();
)
Form onblur
body (
text-align:center;
)
h1 (
color:pink;
)
EDUCBA
onblur="myfunc()">
Submit
function myfunc() (
var a = document.getElementById("aaa");
a.value = a.value.toUpperCase();
)
Produzione:

- onchange: questo evento si verifica quando un utente modifica l'elemento esistente nel modulo. Succede quando un elemento perde attenzione.
Codice:
HTML onchange
select the dress color
pink
Yellow
White
Nota: selezionare qualsiasi opzione
Descrivi te stesso in breve:Invia
Produzione:
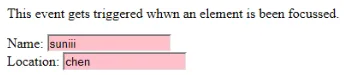
- onfocus: questo attributo è abilitato quando l'utente presta attenzione all'elemento in una pagina Web o quando l'input è focalizzato. L'esempio di seguito viene evidenziato quando immettiamo un input nel campo.
Codice:
Questo evento viene attivato mentre un elemento è stato focalizzato.
Nome:Posizione:
funzione onfoc (a) (
document.getElementById (a) .style.background = "pink";
)
Produzione:
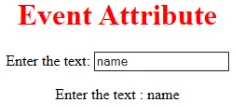
- oninput: questo evento si attiva quando si immette l'input nel campo di input. È stato attivato quando il valore nel campo di testo viene modificato. Riflette una volta modificato il valore dell'elemento.
HTML oninput

body (
text-align:center;
)
h1 (
color:red;
)

Event Attribute
Enter the text:

function myon()
(
var x = document.getElementById("EDUCBA").value;
document.getElementById("sid").innerHTML = "Enter the text : " +x;
)
HTML oninput
body (
text-align:center;
)
h1 (
color:red;
)
Event Attribute
Enter the text:
function myon()
(
var x = document.getElementById("EDUCBA").value;
document.getElementById("sid").innerHTML = "Enter the text : " +x;
)
HTML oninput
body (
text-align:center;
)
h1 (
color:red;
)
Event Attribute
Enter the text:
function myon()
(
var x = document.getElementById("EDUCBA").value;
document.getElementById("sid").innerHTML = "Enter the text : " +x;
)
HTML oninput
body (
text-align:center;
)
h1 (
color:red;
)
Event Attribute
Enter the text:
function myon()
(
var x = document.getElementById("EDUCBA").value;
document.getElementById("sid").innerHTML = "Enter the text : " +x;
)
Produzione:

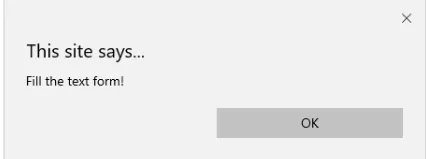
- oninvalid: questo attributo chiama gli eventi quando il testo inserito nel tipo di input non è valido o rimane vuoto. Questo attributo di evento deve riempire l'elemento di input.
Codice:
example oninvalid Event
p (
color:orange;
)
body (
text-align:center;
)
HTML viene utilizzato per creare una pagina Web
Inserisci il nome:Produzione:

- onreset: viene attivato quando una forma è a riposo. L'esempio seguente indica che quando si invia il pulsante viene elaborato un modulo e, quando si fa clic per reimpostare, il modulo viene ripristinato.
Codice:
body (font-family:calibri;)
label (font-variant:small-caps;)
ol (background-color:#610000; margin-top:35px;)
li (margin-top:3px; padding:3px; background-color:rose; font-size:15px;)
div (position:absolute;top:250px;left:70px; font-size:1.5em;
)
Form with input to reset and submit
Enter input:
function onInva() (
alert("Input field cannot be empty!");
)
function onInp() (
var input_value = document.getElementById("iv").value;
document.getElementById("a_box").innerHTML = "Input value:
" + iv;
)
function onRes() (
alert("form is reset!");
)
function onSubmitEvent() (
alert("Form is loading");
location.reload();
)
Produzione:
- onsearch: funziona quando un utente preme un pulsante di invio .
Codice:
Scrivi nel campo.
funzione myF () (
var k = document.getElementById ("value1");
document.getElementById ("sample"). innerHTML = "l'elemento di ricerca è:" + k.value;
)
Produzione:

- onselect: viene attivato quando un testo è stato selezionato in una casella di input. Genera una finestra di dialogo che stampa un messaggio di avviso.
Codice:
onselect demo
h1 (
color:magenta;
)
body (
text-align:center;
)

function eduhtml() (
alert("text highlighted!");
)

EDUCBA Online tutorial
Text Box:
onselect demo
h1 (
color:magenta;
)
body (
text-align:center;
)
function eduhtml() (
alert("text highlighted!");
)
EDUCBA Online tutorial
Text Box:
onselect demo
h1 (
color:magenta;
)
body (
text-align:center;
)
function eduhtml() (
alert("text highlighted!");
)
EDUCBA Online tutorial
Text Box:
onselect demo
h1 (
color:magenta;
)
body (
text-align:center;
)
function eduhtml() (
alert("text highlighted!");
)
EDUCBA Online tutorial
Text Box:
Produzione:

- onsubmit: lo scopo di questo evento è eseguire l'azione eseguita premendo il pulsante di invio.
Codice:
Onsubmit Example
Enter name:
Email :
function myF() (
alert("The form was submitted");
)
Produzione:
3. Attributi della tastiera
- OnKeyDown: viene attivato quando un utente preme un tasto freccia giù.
Codice:
Esempio per Onkeydown.
function mykedwn () (
avviso ("la pressione del tasto è attivata");
)
Produzione:
- OnKeyPress: questo evento viene attivato quando l'utente preme un tasto qualsiasi della tastiera. Nota: alcuni browser non supportano la pressione di alcun tasto.
Codice:
Questo esempio mostra quando un utente digita nell'area di testo innesca un evento
>Produzione:

- OnKeyUp: questo attributo viene attivato quando un utente rilascia un cursore dal campo di testo. Di seguito viene la dimostrazione.
Codice:
Questo esempio trasforma il carattere in minuscolo.
Inserisci il nome:function mykey () (
var g = document.getElementById ("jjj");
g.value = g.value.toLowerCase ();
)
Produzione:

4. Attributi dell'evento del mouse
Questa azione attiva un evento del mouse quando un mouse viene premuto da un computer o da qualsiasi dispositivo esterno come uno smartphone o un tablet. Di seguito sono riportati alcuni degli eventi del mouse:
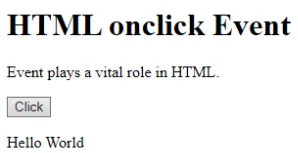
- onclick: viene attivato quando un utente preme il pulsante sopra il mouse. Di seguito è riportato un esempio di input per mostrare l'evento mentre si fa clic con il mouse.
Codice:
HTML onclick Event
HTML onclick Event
HTML onclick Event
L'evento svolge un ruolo vitale in HTML.
Clicfunzione oncf () (
document.getElementById ("sample"). innerHTML = "Hello World";
)
Produzione:
- onmousemove: viene attivato quando un mouse viene spostato su un'immagine in qualsiasi direzione.
Codice:
Event onmousemove demo
Questo evento si attiva quando il puntatore trascina la sua direzione.
Testo di esempioProduzione:
- Onmouseup: questo evento fornisce una notifica quando un utente rilascia un pulsante su un output.
Codice:
body (
color: "#ff0000";
height: 120vh;
background-color: #610000;
text-align: center;
)
.polygon (
float: right;
shape-inside: polygon(0 0, 0 200px, 100px 200px);
clip-path: polygon(0 0, 0 250px, 100px 300px);
height: 200px;
width: 200px;
background: linear-gradient(to bottom left, #7CFC00, #8B008B);
)
p (
margin: 30px auto;
)

HTML onmouseup Demo
body (
color: "#ff0000";
height: 120vh;
background-color: #610000;
text-align: center;
)
.polygon (
float: right;
shape-inside: polygon(0 0, 0 200px, 100px 200px);
clip-path: polygon(0 0, 0 250px, 100px 300px);
height: 200px;
width: 200px;
background: linear-gradient(to bottom left, #7CFC00, #8B008B);
)
p (
margin: 30px auto;
)
HTML onmouseup Demo
clicca sotto l'oggetto
funzione mupFn () (document.querySelector ('. polygon'). style.transform = 'scale (2.2)';
)
Produzione:

- Onmouseover: esegue un JavaScript quando si sposta il puntatore del mouse su un'immagine
Codice:
Example demonstrating Onmouseover.
Mouse over
function A() (
document.getElementById("sample").style.color = "yellow";)
function B() (
document.getElementById("sample").style.color = "green";
)
Example demonstrating Onmouseover.
Mouse over
function A() (
document.getElementById("sample").style.color = "yellow";)
function B() (
document.getElementById("sample").style.color = "green";
)
Example demonstrating Onmouseover.
Mouse over
function A() (
document.getElementById("sample").style.color = "yellow";)
function B() (
document.getElementById("sample").style.color = "green";
)
Example demonstrating Onmouseover.
Mouse over
function A() (
document.getElementById("sample").style.color = "yellow";)
function B() (
document.getElementById("sample").style.color = "green";
)
Produzione:
5. Trascina gli attributi dell'evento
Questa applicazione aiuta nella finestra HTML quando l'utente trascina l'elemento di input. Di seguito sono riportati i diversi listener di eventi utilizzati in HTML per archiviare i dati trascinati.
- Ondrag: viene utilizzato quando un elemento viene trascinato dalla pagina Web.
- Ondragstart : si attiva quando l'utente inizia a trascinare dal campo di input. L'esempio seguente mostra come trascinare l'area a due target.
Codice:
#b1, #b2 (
float:left;padding:11px;margin:11px; -moz-user-select:none;
)
#b1 ( background-color: #FF6699; width:65px; height:85px; )
#b2 ( background-color: #808000; width:180px; height:180px; )

function dStart(e) (
e.dataTransfer.effectAllowed = 'move';
e.dataTransfer.setData("Text", e.target.getAttribute('id'));
e.dataTransfer.setDragImage(e.target, 0, 0);
return true;
)


Drag demo
Drag the box.
ondragstart = "return dStart(e)">
Drag it
welcome
#b1, #b2 (
float:left;padding:11px;margin:11px; -moz-user-select:none;
)
#b1 ( background-color: #FF6699; width:65px; height:85px; )
#b2 ( background-color: #808000; width:180px; height:180px; )
function dStart(e) (
e.dataTransfer.effectAllowed = 'move';
e.dataTransfer.setData("Text", e.target.getAttribute('id'));
e.dataTransfer.setDragImage(e.target, 0, 0);
return true;
)
Drag demo
Drag the box.
ondragstart = "return dStart(e)">
Drag it
welcome
Produzione:

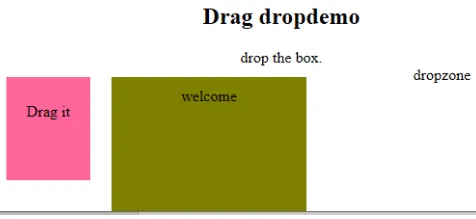
- ondrop: esegue questo attributo quando un elemento trascinabile viene rilasciato nell'elemento.
Codice:
#b1, #b2 (
float:left;padding:11px;margin:11px; -moz-user-select:none;
)
#b1 ( background-color: #FF6699; width:65px; height:85px; )
#b2 ( background-color: #808000; width:180px; height:180px; )

function dStart(e) (
e.dataTransfer.effectAllowed = 'move';
e.dataTransfer.setData("Text", e.target.getAttribute('id'));
e.dataTransfer.setDragImage(e.target, 0, 0);
return true;
)


Drag dropdemo
drop the box.
ondragstart = "return dStart(e)">
Drag it
ondrop="drop(event)"
ondragover="allowDrop(event)">
welcome
dropzone
Produzione:
Conclusione
Questo attributo di evento aiuta a rendere un'applicazione Web molto più semplice e attraente. La diversa occorrenza di azioni genera vari eventi. Anche se questo approccio è generalmente evitato, ma al programmatore piace apprendere la funzione assegnata agli eventi degli attributi HTML e questi gestori di eventi vengono comunque eseguiti per abbellire le pagine Web.
Articolo raccomandato
Questa è una guida agli attributi dell'evento HTML. Qui discutiamo l'introduzione agli attributi degli eventi HTML insieme all'implementazione e all'output del codice. puoi anche consultare i nostri articoli suggeriti per saperne di più -
- Breve introduzione ai frame HTML
- Modifica dell'attributo di stile HTML
- Applicazioni di HTML | Primi 10 usi
- 10 migliori differenze HTML vs HTML5 (infografica)
- Lancio contro Lancio | Le 5 differenze principali che dovresti conoscere
- Imposta un colore di sfondo in HTML con Esempio